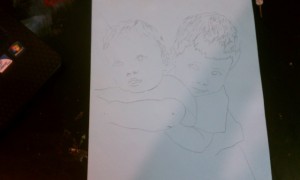
Portait Using Transfer (Carbon) Paper

A while ago I saw this neat style of Portait Painting. Here’s a way to do it if you are not good at free-hand portait sketching (which describes me 🙂  ).

Skill: Beginner

Materials: Canvas, Acrylic Paint in your background color and in Black (I like Liquitex Basics…thanks Nicci!), Transfer Paper, and a Grayscale Photo printed to the size you want the finished picture to be

Tools: Paint Brush with a small point, Craft Sponge, Stylus, and Pen

Prep the Canvas

Paint the canvas the color you want for the background using your Craft Sponge. Pale colors tend to look the best, like the pale blue I chose. I saw a portrait like this where the people were painted on a medium green background and it made them look like they were sick. While it dries you can work on the photo itself.

Prep the Photo
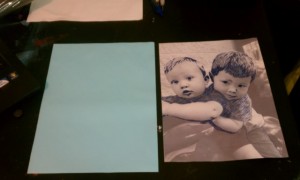
Print out the photo you wish to use in Grayscale. This makes it easier to see where you want to show shadows and where you just want to outline. With your pen draw out the outlines and color the shadows you want to include in your finished Portrait. This also gives you a chance to practice. If you make a shadow that looks overbearing or weird, just note it so you don’t trace it onto the canvas later. For example, I didn’t like the shadow on the baby’s upper lip so I was careful to only trace the outline onto the canvas when I came to that step.

Trace Photo onto Canvas 


Layer from bottom to top: Dry Canvas, Transfer Paper, Photo. Notice at the top you can see all three layers; tape to table here so that the tape adheres to all of the layers. Now as you trace you can lift the tracing paper to see your progress on the canvas, without misaligning the photo on top. Using your stylus trace all the markings you made previously with your pen. When you are finished the canvas will look like you sketched the portrait with a pencil; and if you made a line you do not want, it will erase with a normal pencil eraser.

If you don’t get it quite centered on the canvas, not to worry, neither did I! You can trim the excess borders later before framing.

A trick I thought of later is to initially draw on the photo with a blue pen, then trace onto the canvas with a black pen (instead of the stylus). That way you can easily see the lines that have yet to be traced and you don’t have to buy a stylus. Hind sight is 20/20 🙂

Paint It! 

Paint over all the pencil lines with your black paint. Using a moist brush (dip in water and wipe on papertowel) will help you make smooth lines, but it will be see-through the first time. I painted two coats of black (three in some places) to get a solid black portrait.

HAPPY PAINTING !!!

(Jen)

Linking up at:

Make Your Own Chalkboard


I came across this great post from another fellow crafter. It is ridiculously easy to make your own Chalkboads in any color you can think of. Take a look:

http://salttree.blogspot.com/2011/08/make-it-chalkboard-paint.html?showComment=1319328826851#c2816253394819519925

Not sure how I will use this great idea yet, but it’s on my list.

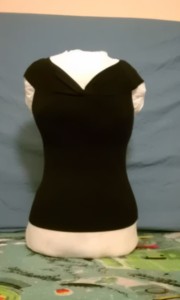
Custom Dress Form

I’ve wanted a dress form for a long, long, long time; but they are so expensive! Finally I found the time to make one myself and here’s how I did it.

Sewing Skill: Advanced (Create Pattern and Assemble Bodice with Zipper)

Materials: Brown Paper, Fabric, Thread, Zipper, Hook and Loop Strip, Ribbon, Cardboard, Polyfill (I used 2 large bags)

Tools: Sewing Machine and Iron

Create a Custom Paper Bodice Sloper

I learned how to make a Bodice Sloper from a tutorial online. There are only a few tutorials I could find for free on the internet and this is by far the best one. It even shows you how to take your body measurements. You could use a Fitted Blouse Pattern you have already, but this sloper will come in handy if you want to start making your own patterns later on.

1. Take your measurements and fill in the chart in this link (MEASUREMENTS ARE TAKEN IN CM!!!):

http://www.leenas.com/English/measure_women.html

2. Use your measurements to complete the table in this link and draft your Custom Bodice Sloper:

http://www.leenas.com/English/draw_bodice.html

3. Note that this Bodice Sloper is exact to your measurements and you will have to add seam allowance when cutting out fabric later with them.

Cut and Sew the Dress Form

1. Choose a fabric that does not stretch. A stiffer fabric is best.

2. Place the paper sloper front on the fold of your fabric and place the paper sloper back on the fold too. Cut both front and back outside the edge of the paper to give yourself the desired seam allowance. I used 3/8″ seam allowance.

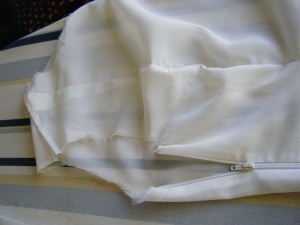
3. Sew one side seam with right sides together. Sew a zipper into the other side seam.

4. Sew one shoulder seam with right sides together. Sew hook and loop into the other shoulder seam.

(These zipper and hook and loop openings allow you to take the sloper on and off during the fitting process.)

5. Sew the front and back darts. I added side darts so that the sloper fits around my chest perfectly. Try the sloper on and adjust your darts until it completely conforms to all your curves. This is the challenging part and will give you good practice at fitting a garment. (During this fitting process, mark your adjustments to the darts on your paper Bodice Sloper if you intend to use it to create Sewing Patterns later.) The fabric sloper should be very tight.

Create a Base and Close Holes

1. Loosely stuff the dress form with Polyfill (this stuffing is temporary).

2. Cut a strip of fabric to be used to close up the base hole:

a. Measure the width of the base of your dress form and divide this number by 2. This will be the width of the strip of fabric.

b. Measure the distance around the base with a piece of ribbon and cut it to this length. The ribbon will be used as a drawstring later. Remove the Polyfill.

c. Cut a strip of fabric to the width measured in “a” and as long as the ribbon “b”. Finish the two short edges. Create a drawstring pocket in one long edge by folding the edge over twice and sewing close to the fold. Then sew this to the bottom of the dress form by matching raw edges with right-sides together.

3. Follow the steps in number #2 for the arm holes, except finish the long edge instead of creating a drawstring.


4. Fill the dress form up again and cut out a cardboard base roughly the shape of the bottom of the dress form. Insert this inside the dress form and pull the drawstring to seal up the base.


5. To finish the arm holes, gather stitch the finished long edge and tie off.


6. Continue to stuff Polyfill into the dress form until it is firmly stuffed. The Polyfill doesn’t make a perfectly smooth surface, but it will not affect the shape of the clothes you are fitting on the dress form.


(by Jen)

Spruce Up Your Curtains

So my little ones totally destroyed my vertical blinds and I decided a curtain would be a better idea. When I put it up though, I found out the curtain I bought was too short! (Sadie gave a sad pose to sympathize with me in the Before Picture.) This is exactly why I save every piece of fabric I don’t use 🙂  Here’s what I did…


Sewing Skill: Beginner (just straight seams and top-stitching)

Materials: Fabric and Thread

Tools: Sewing Machine and Iron

Lengthening the Hem:

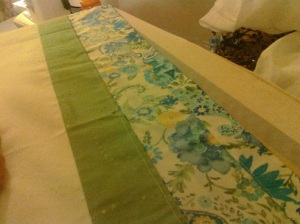
1. Cut a strip of fabric as wide as the extra length you need plus 2″ (I think a thick hem looks best for this), and as long as the curtain is wide plus 1″ seam allowance. Iron a 1/4″ seam along the length of one side.

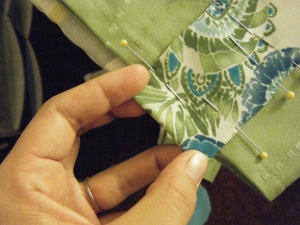
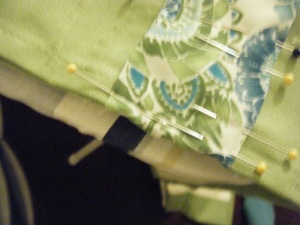
2. Pin this to the bottom edge of your curtain and top stitch into place.

3. Hang your curtain and mark where you want the new hem to end just above the ground. Fold the raw edge under 1/4″ and press with the iron. Then fold under again where you want the hem to end and press with the iron. Pin and top stitch your hem.

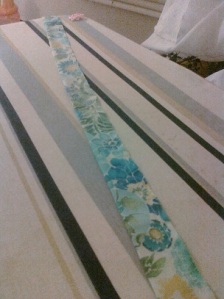
4. To finnish the side edges of your new hem, fold the raw edge under 1/4″ and then again to hide the frays. Top-stitch into place. Here’s my new hem:

Trim the Top of the Curtain

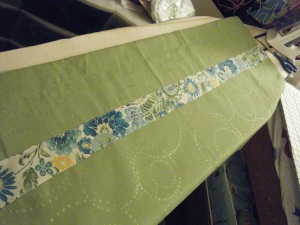
I thought it wasn’t enough to just slap on some random fabric at the bottom. To make the new hem look like it belonged on the curtain, I added a strip of the same fabric just below the curtain rod.

1. Cut a strip of fabric 2  1/2″ wide, and as long as the curtain is wide plus 1″ for seam allowances. Fold under both long raw edges and press with the iron. Pin just below the seam line for the curtain rod pocket and top-stitch into place.


2. To finish the raw edges on the sides, tuck them under 1/4″ and then again to hide the frays. Then top-stitch.

Looking good now!

Make a Sash Tie-Back

1. Cut a strip of fabric 2  1/2″ wide and as long as the curtain is wide. Fold right-sides together and sew 1/4″ seam along the raw edges. be sure to leave the ends open!

2. Turn the sash right-side out, press with the iron, and top-stitch along the seam edge.


(by Jen)

Linked up at:

Magical Leaves with Glitter and Wax

A friend of mine shared this idea with me and I think it is so great! I haven’t done anything with it yet, but I still wanted to share it here. I never would have thought to use wax for this!

http://www.homemakerinheels.com/2011/09/falling-in-love-with-falling-glitter.html?spref=fb

Enjoy!

Fabric Flowers

image

image

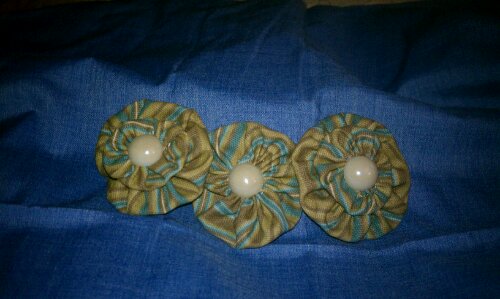
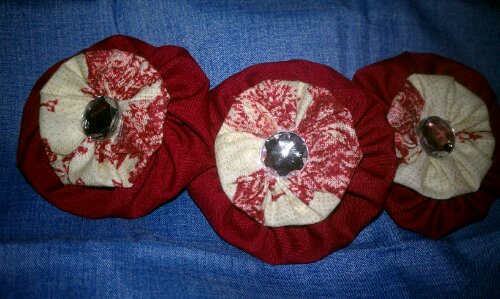
I had some extra fabric and was not sure what do with it. I finally decided to make flowers!!!! I love these because they are so fun and easy to make. They can be added to a  headband, hair clip, or a pin. They can add some color to a shirt or a purse. 🙂